


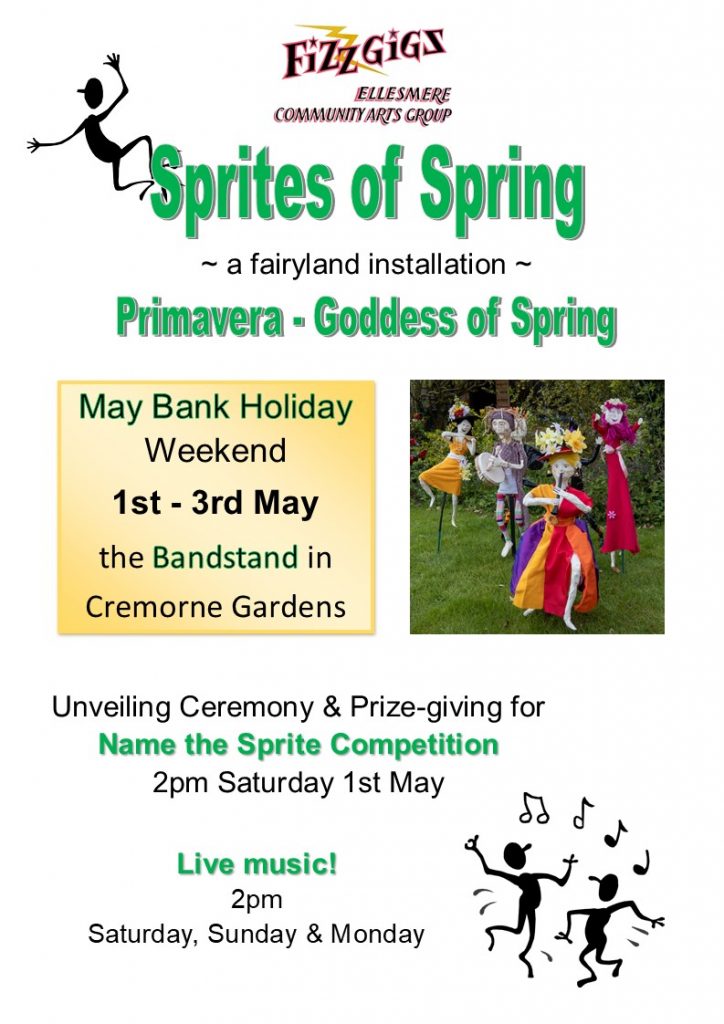
At the last Merefest we created a sprites’ party in a small woodland clearing. It was dark and they were painted and dressed in white, lit by torches and fire cans for atmospheric and ethereal effect. This spring we planned a community arts event on the May Day weekend where the sprites were in full daylight, dancing round a mini-maypole and accompanied by Primavera, Goddess of Spring!
If you fancy making your own sprite scroll down to the bottom of this page for instructions.
Instructions on how to make a sprite:
You can download this MS Word or PDF file to print out. It includes written instructions and the diagrams below.
Sprites are mostly built on thin sticks, the ends of which plant in the ground – like mini-scarecrows. Please make sure that each sprite is 2 feet tall! So leaving about 1 ft of stick to stick in the ground
Materials needed
Thin straight stick, 3ft max. – green garden sticks good for this.
Wire – easy to bend and cut, but not too thin.
Latex glue – plus sponge for spreading, and container.
Newspaper, strong white tissue, masking tape – small amounts
Bits of thin card – for hands, maybe hats, ears etc.
Magnolia Emulsion paint – for initial paint cover.
Also bits of wool, string, natural grasses etc for hair; acrylics or waterproof felt pens for facial and other details, small bits of material, ribbons, etc for clothes. Etc etc.
The sprite itself should be about 2ft tall (not including the stick to fix it into the ground).
I hope you will find the following diagrams useful. You may like to adapt them to suit yourselves of course. The more that are made, the merrier. Male or female, they need to be strong individual characters, quite different from each other, except in size. The sprite should be about 2ft tall. Enjoy making!
Handy Hints
Latex glue (Copydex) is the best glue to use. You don’t have to wait for it to dry between coats, and it’s waterproof. Also you can build features on your sprite – eg bums and bosoms – by rolling up slightly glued newspaper to shape, finishing off with glued tissue. It’s also good for creating facial features – noses, ears, chins, cheeks etc. It will really help to create an interesting character. Experiment!
In the initial stages of sprite making, after the wire is assembled on the stick, but before adding paper, if you should fancy creating a dramatic topknot to your head you could tape a bunch of tiny sticks, grasses, artificial flowers, or greenery to the stick so that the bunch sticks out from the head. Natural stuff is good for this, but it could be wool or whatever you fancy. (As long as it’s not heavy).
When you have finished creating your sprite and you have a reasonably strong and smooth covering with the glue and tissue paper, plus created a characterful face and blended the hands and neck into the rest, it’s now time for a coat of paint. Use magnolia emulsion paint as it’s (usually) waterproof, and in this case white, which would show up well against grass etc..
Clothing could be really simple – don’t worry about hems or mini dressmaking – use materials that may easily partly stick in place. Any bright colour will be good. I hope you have an enjoyable creative time!